
You have switched to on your iPhone iOS 16 and you found that it doesn't suit you or that it doesn't work as expected? If you answered yes, you might be interested in how to get out of it. iOS 16 return to iOS 15. There are two options you can use to roll back – the first is without losing data, where it is possible that some errors will appear in the system. The second option is then a clean installation, where you will lose all your data, but you will have a completely clean and error-free system. Let's get straight to the point.
You might be interested in
Backup
Before you do anything, you should of course back up your device. In case anything goes wrong with the following steps, you will at least have the certainty that you will not lose your data. You can back up either using Finderon your Mac (iTunes on Windows), or using iCloudu. In case of backup using Finder(or iTunes) first connect your iPhone to a computer or Mac. Then run it Finder and click on in the right menu the name of your device (in iTunes, tap at the top your device icon). Here, after that, you just need to press the option Back up. In case you want to make a backup on iCloud, then on your device go to Settings, where you click on the very top Your name. Then tap on the option iCloud, then get off below and click the option Backup on iCloudu. Then just tap on Back up. However, keep in mind that the backup iOS 16 z Finder(or iTunes) will not be possible on iOS 15 because older versions of the system do not support backups from newer versions. However, the backup from iOS 15 will come in handy if the downgrade is not successful. Magazine Letem svetem Applem is not responsible for any damaged or stuck equipment, and you perform all procedures at your own risk.
How to return from iOS 16 back to iOS 15 – no data loss
1. Download IPSW
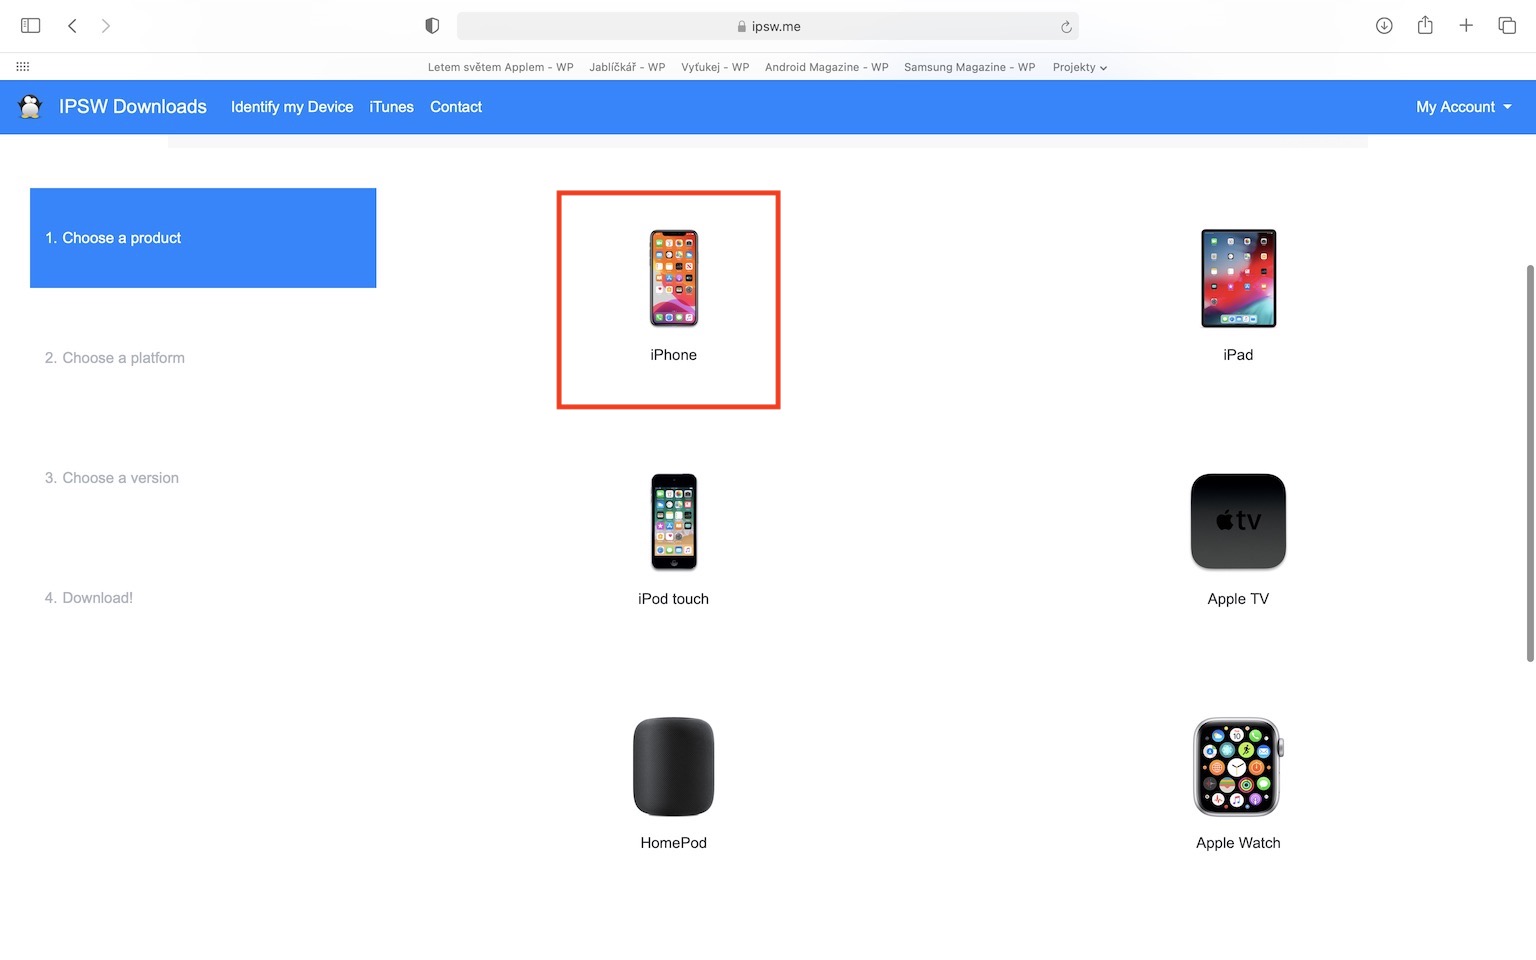
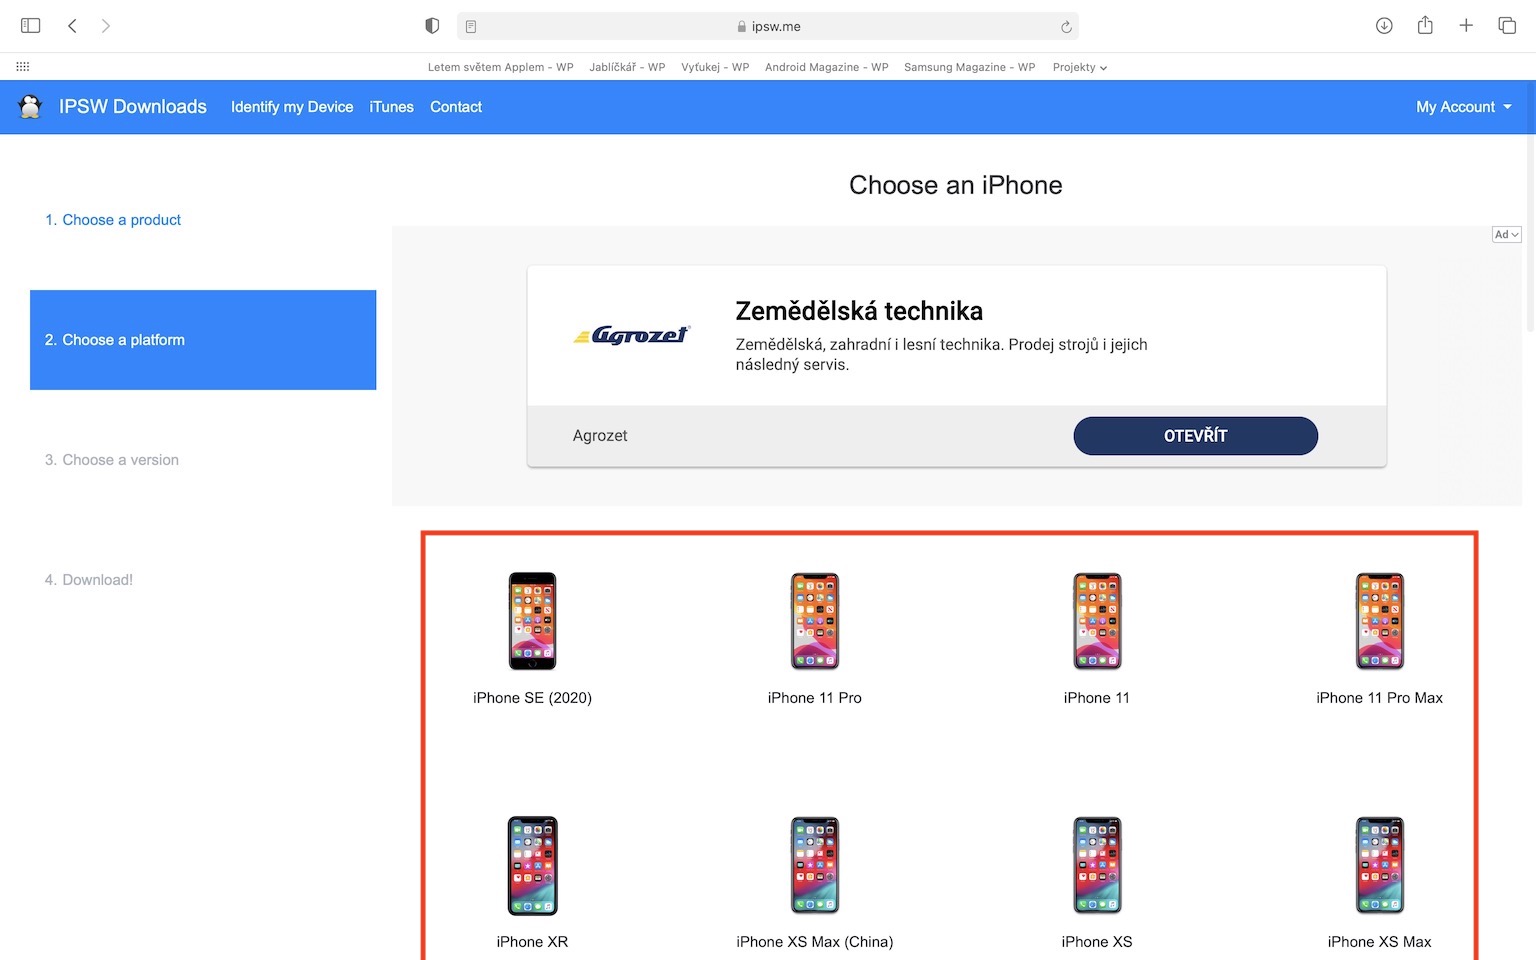
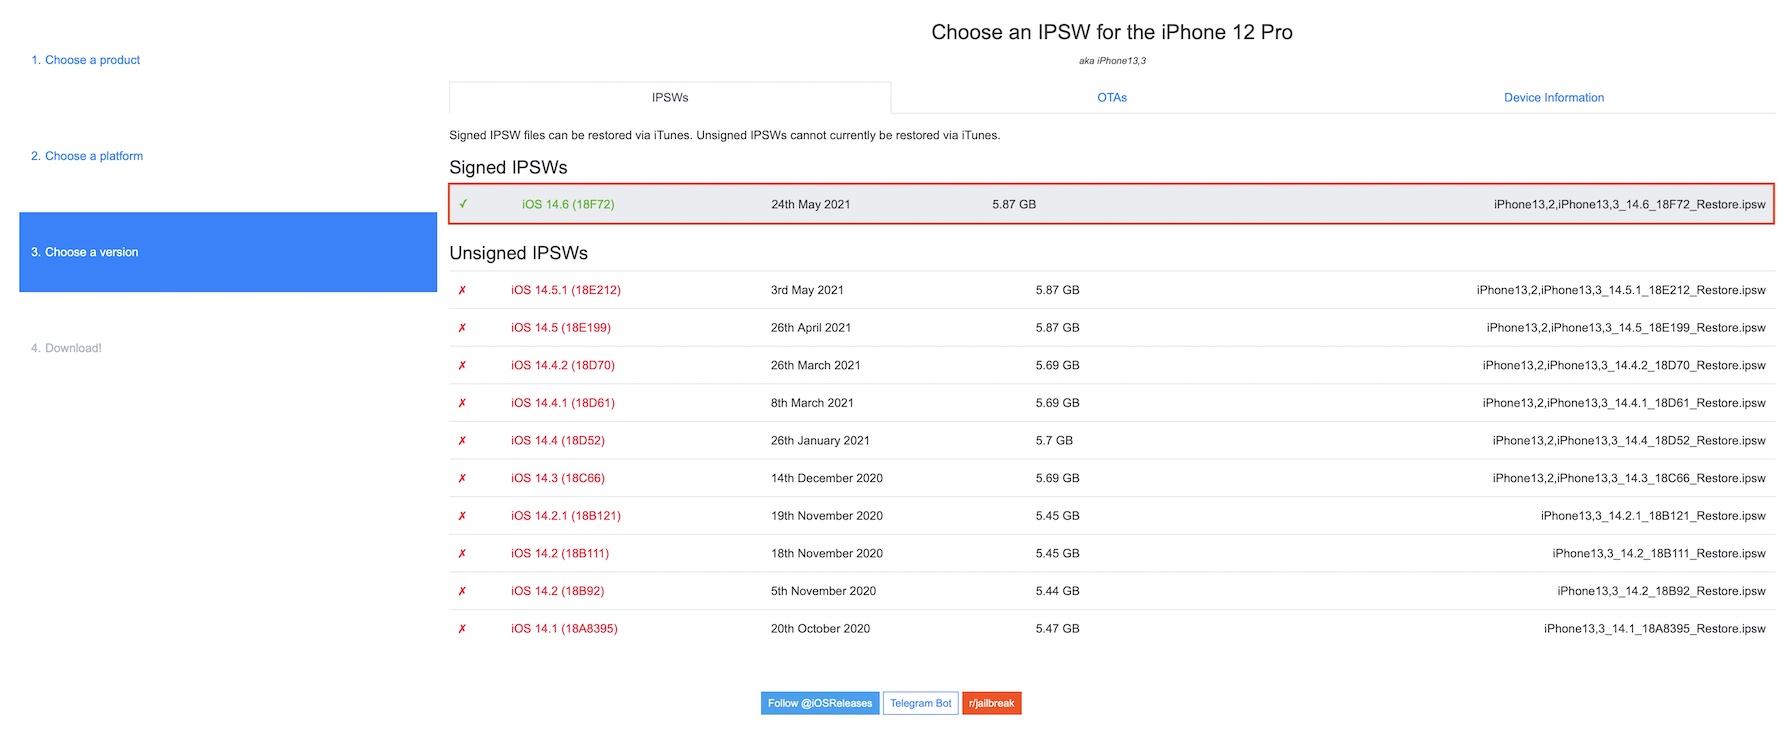
Right from the start it is necessary that you these pages downloaded to your PC or Mac iOS 15.5 for your device. So after clicking on these pages, choose exactly your device, and then click the last one AppleI have a signed version. iOSOnce you do that, all you have to do is press the blue button Download. After downloading, you will see an IPSW file, which is used to downgrade or restore the device. Depending on your connection speed, this file may take some time to download as the file is several gigabytes.
2. Restoration in Finderon (iTunes)
Gallery
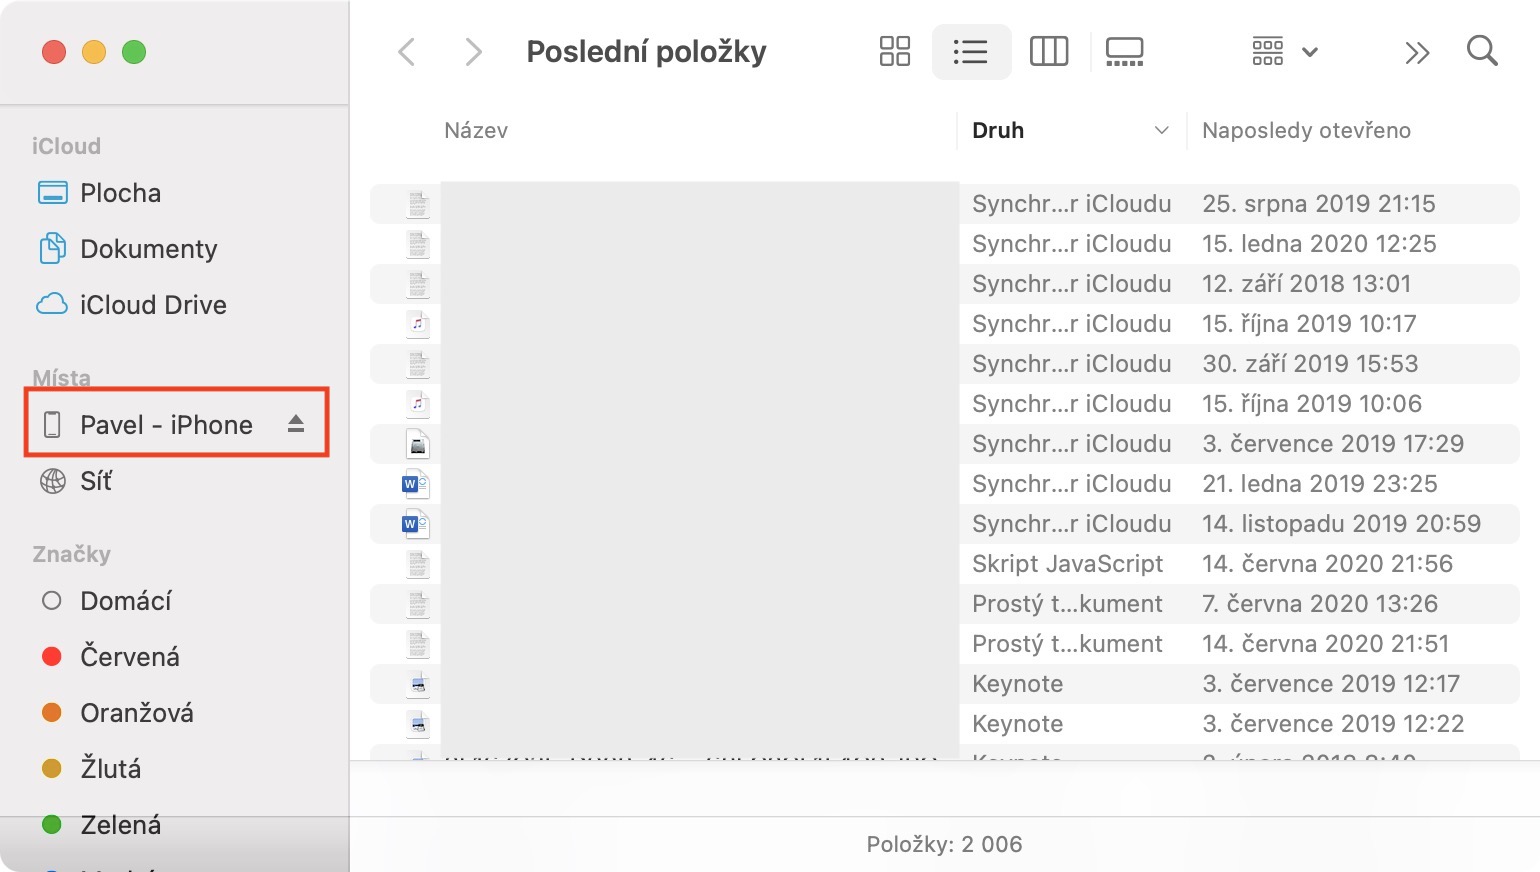
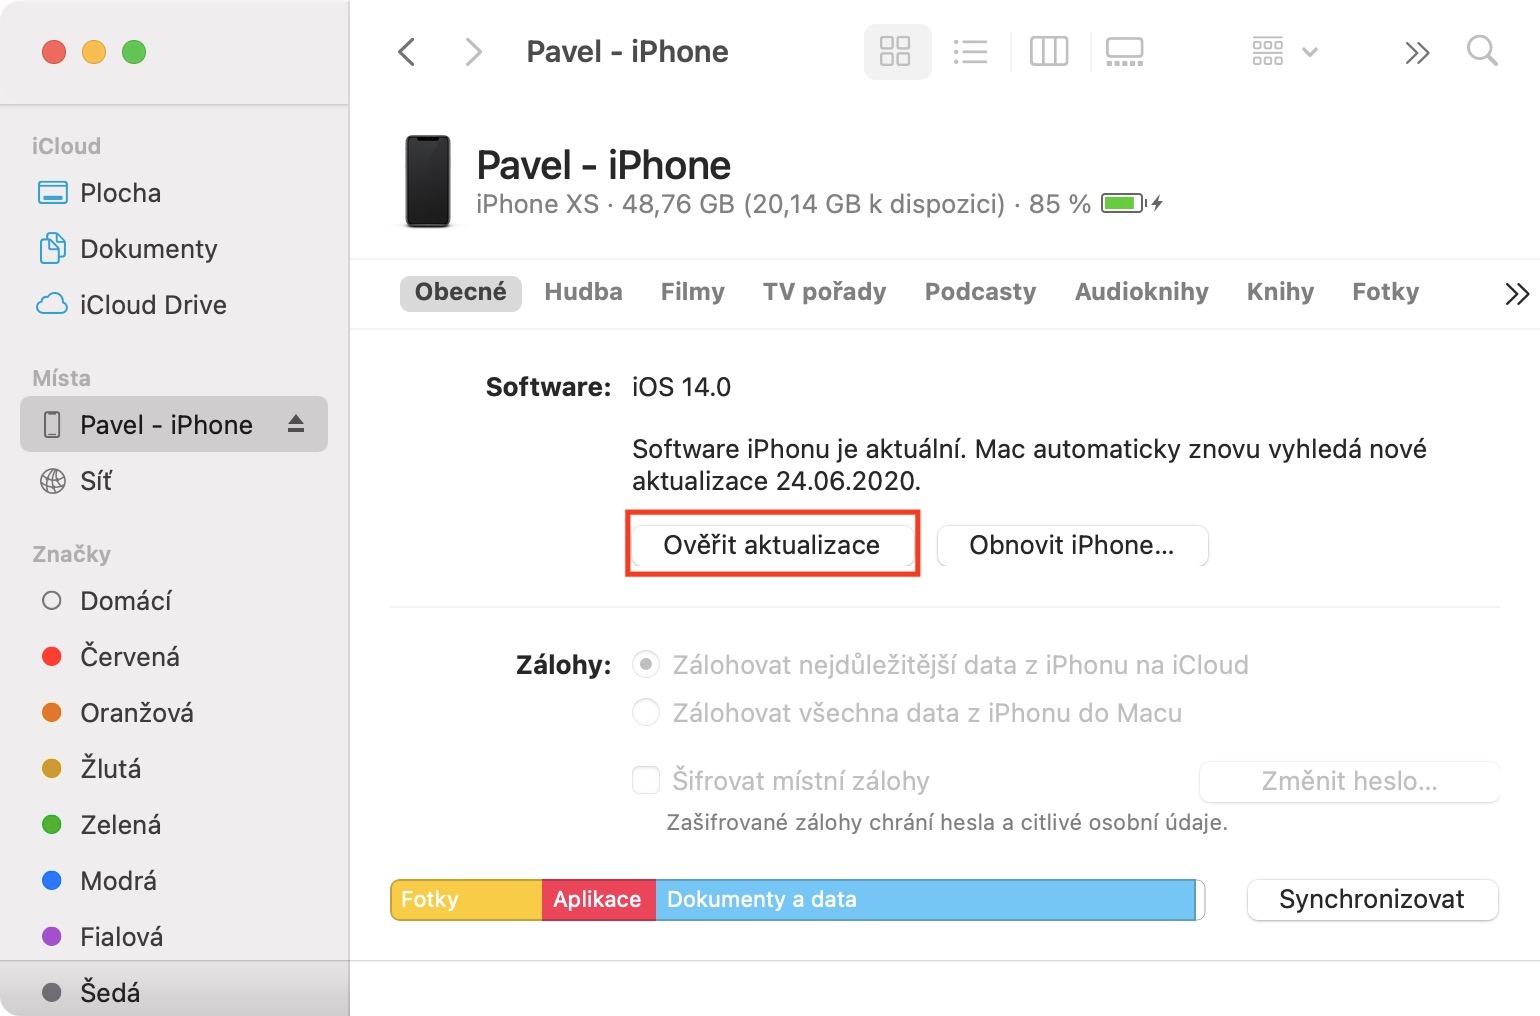
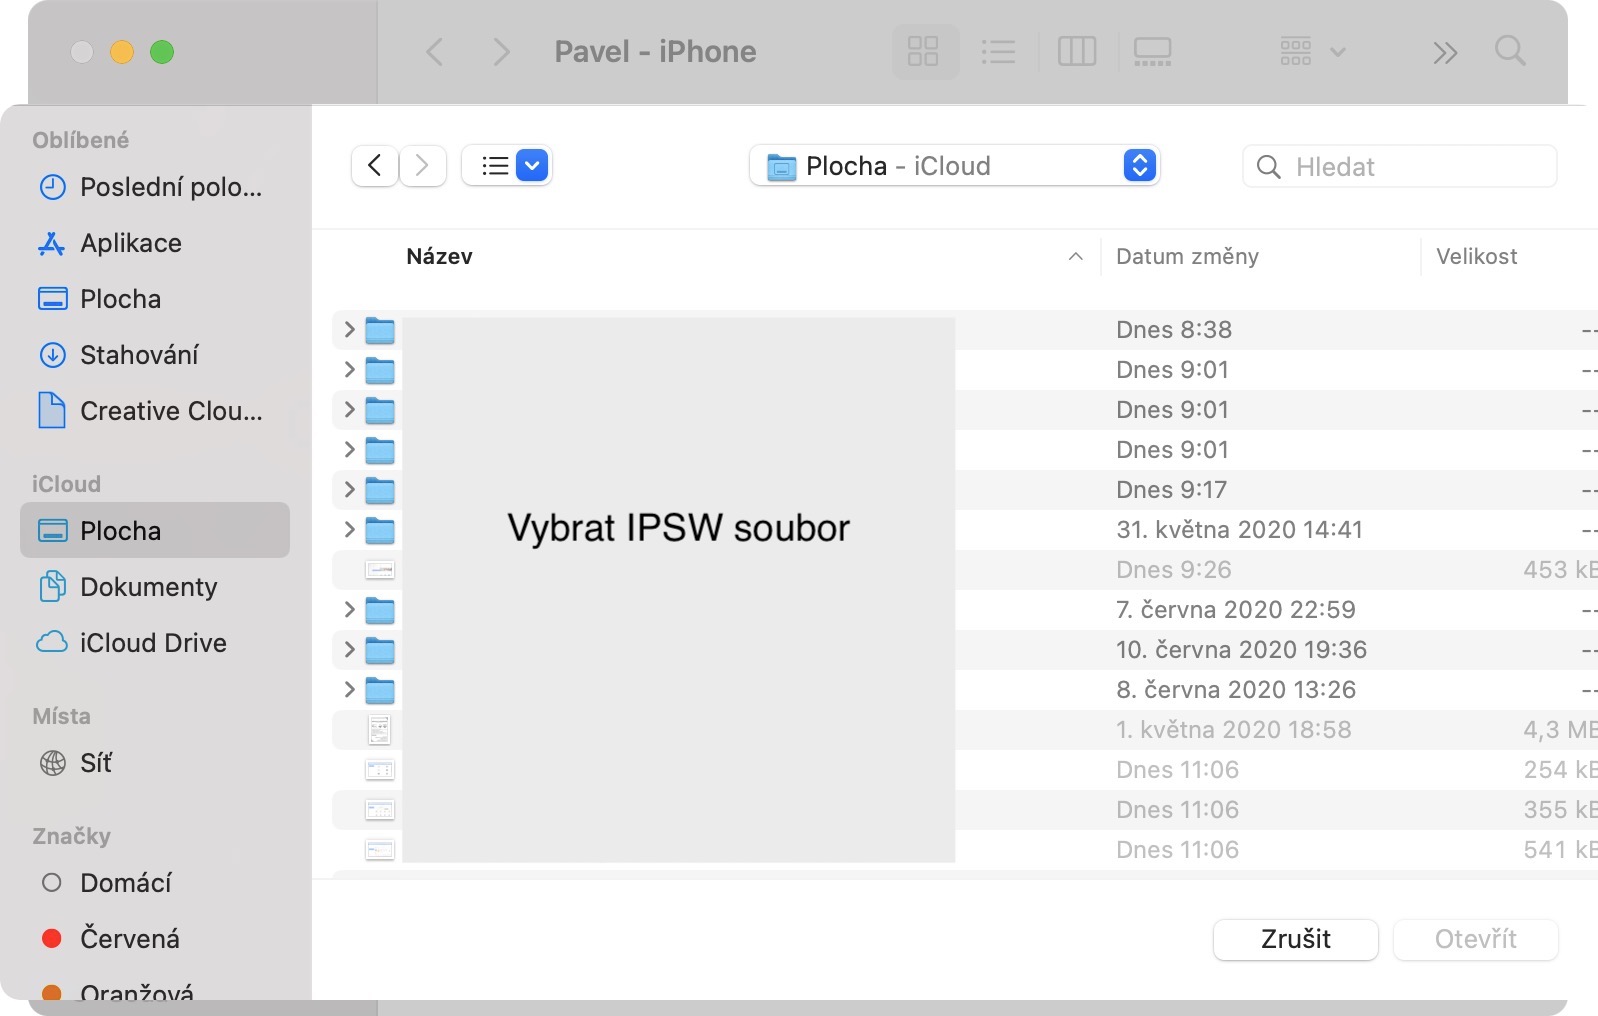
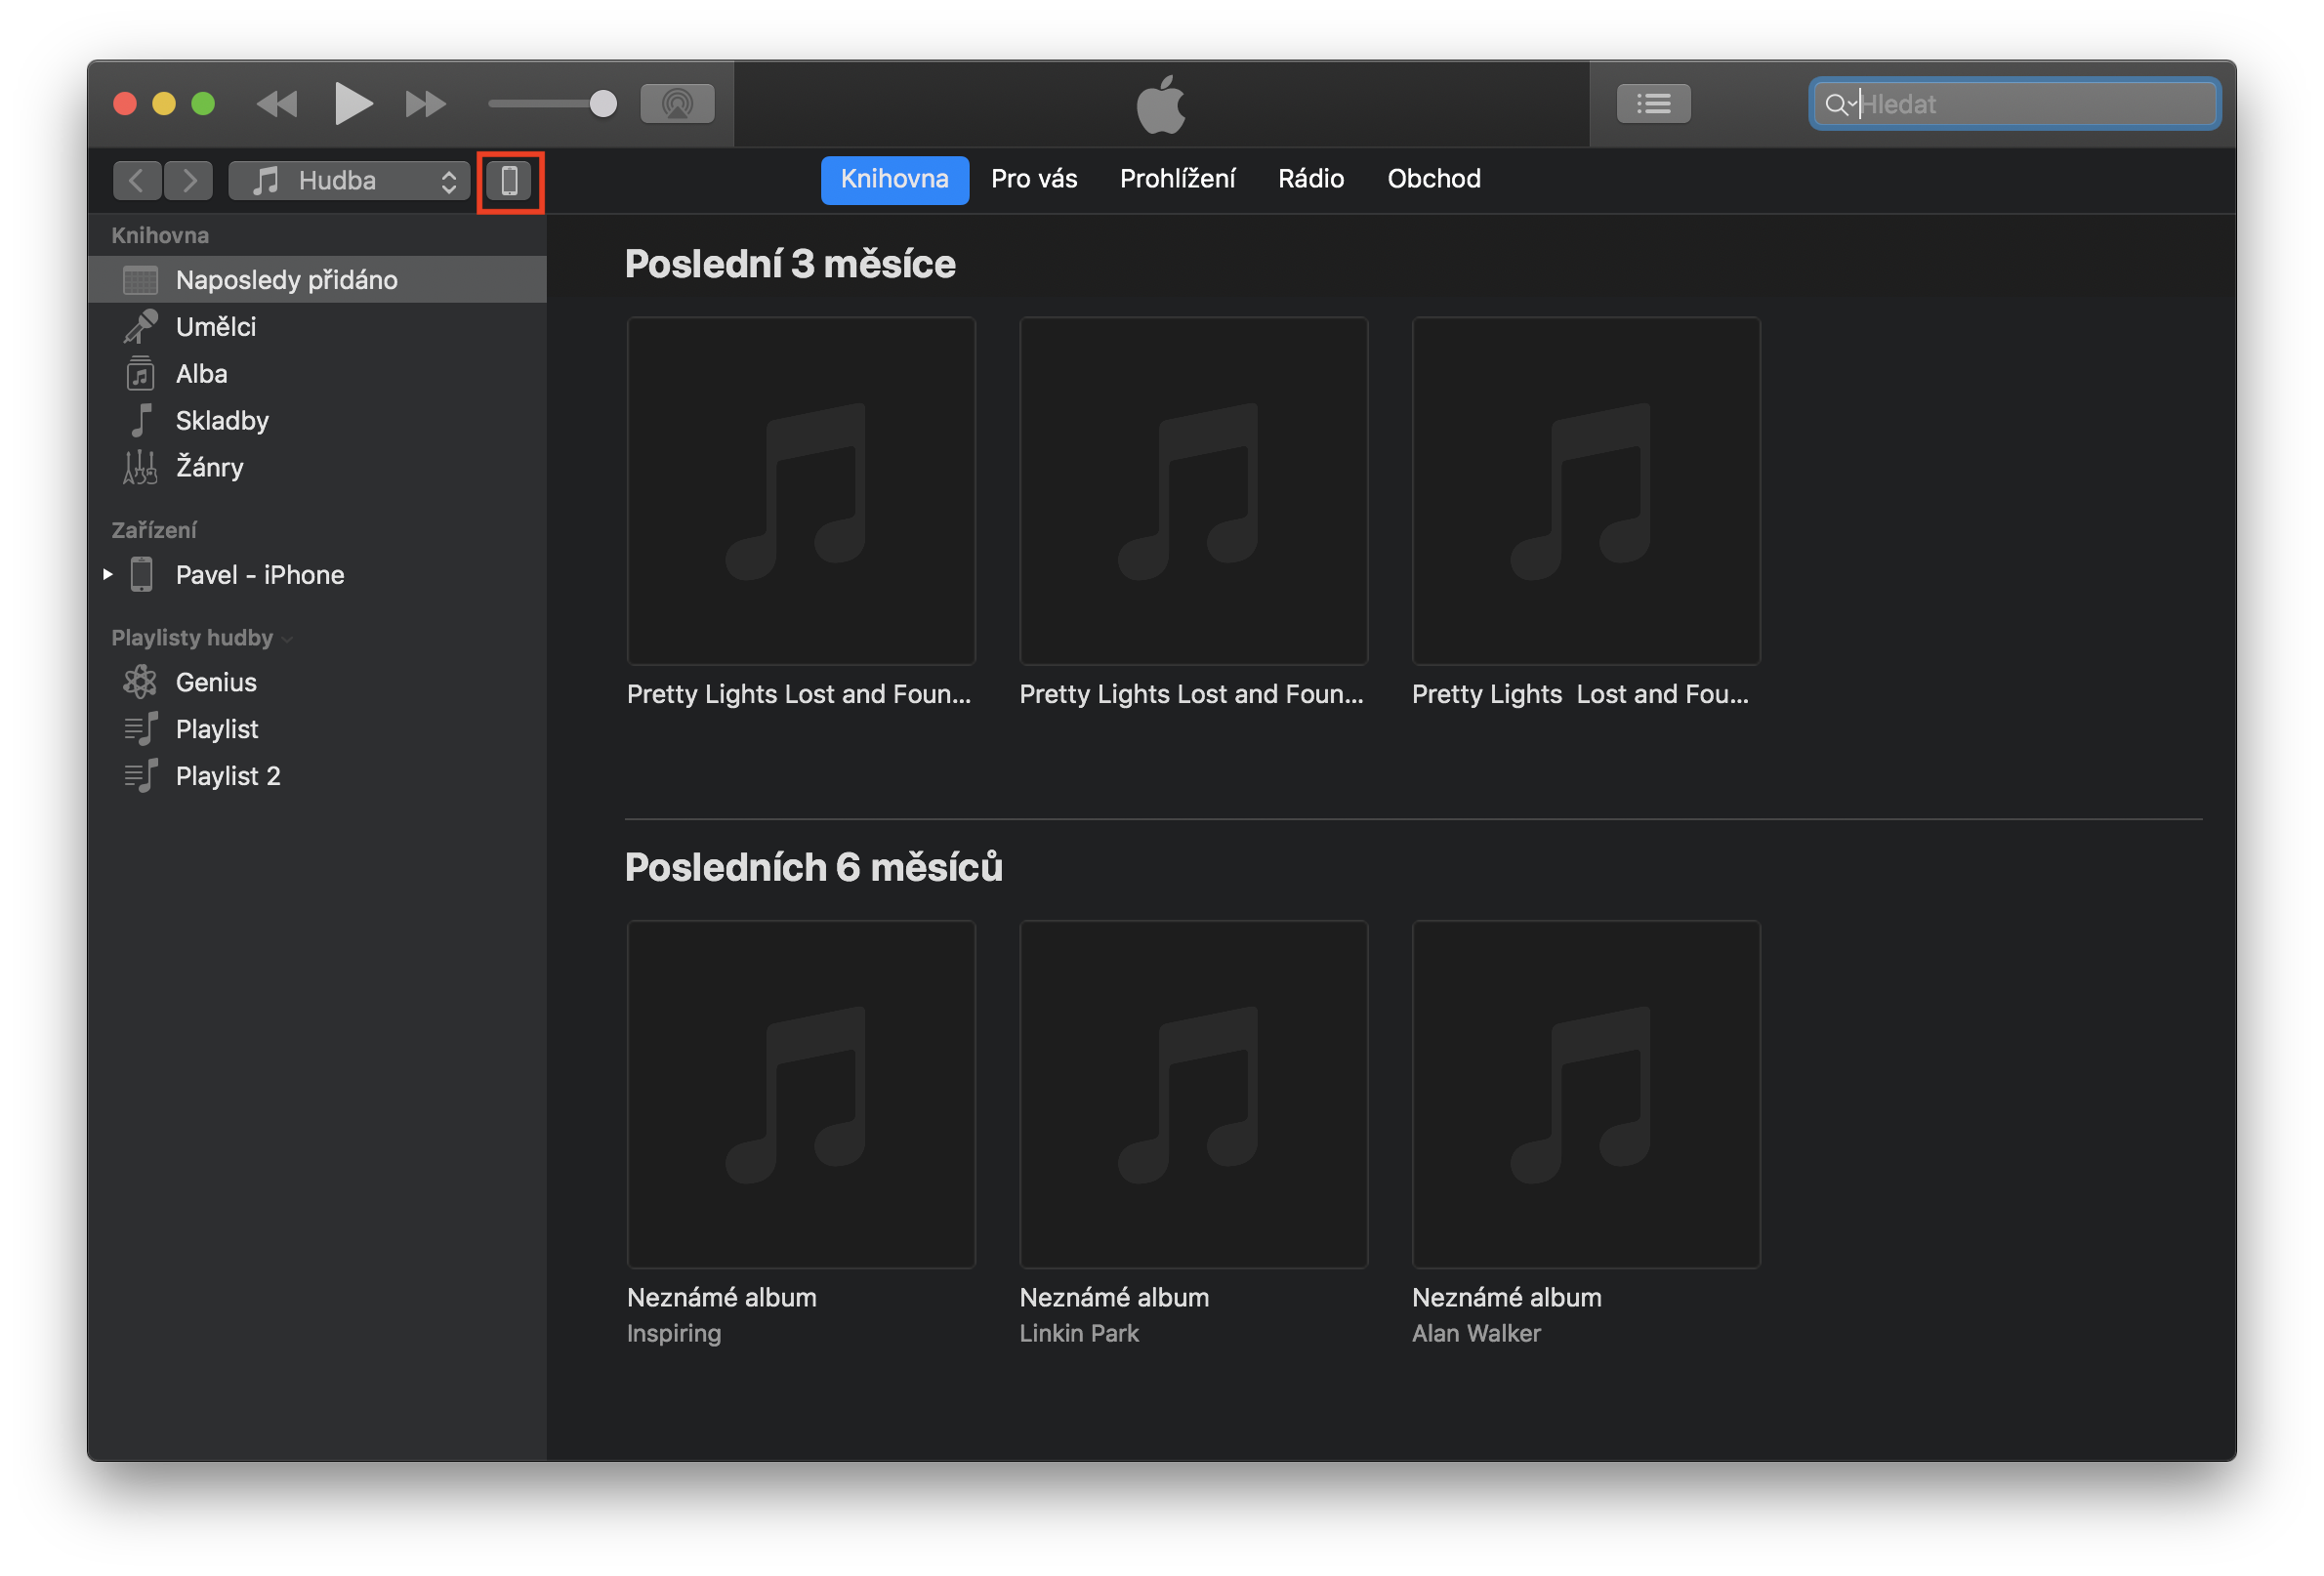
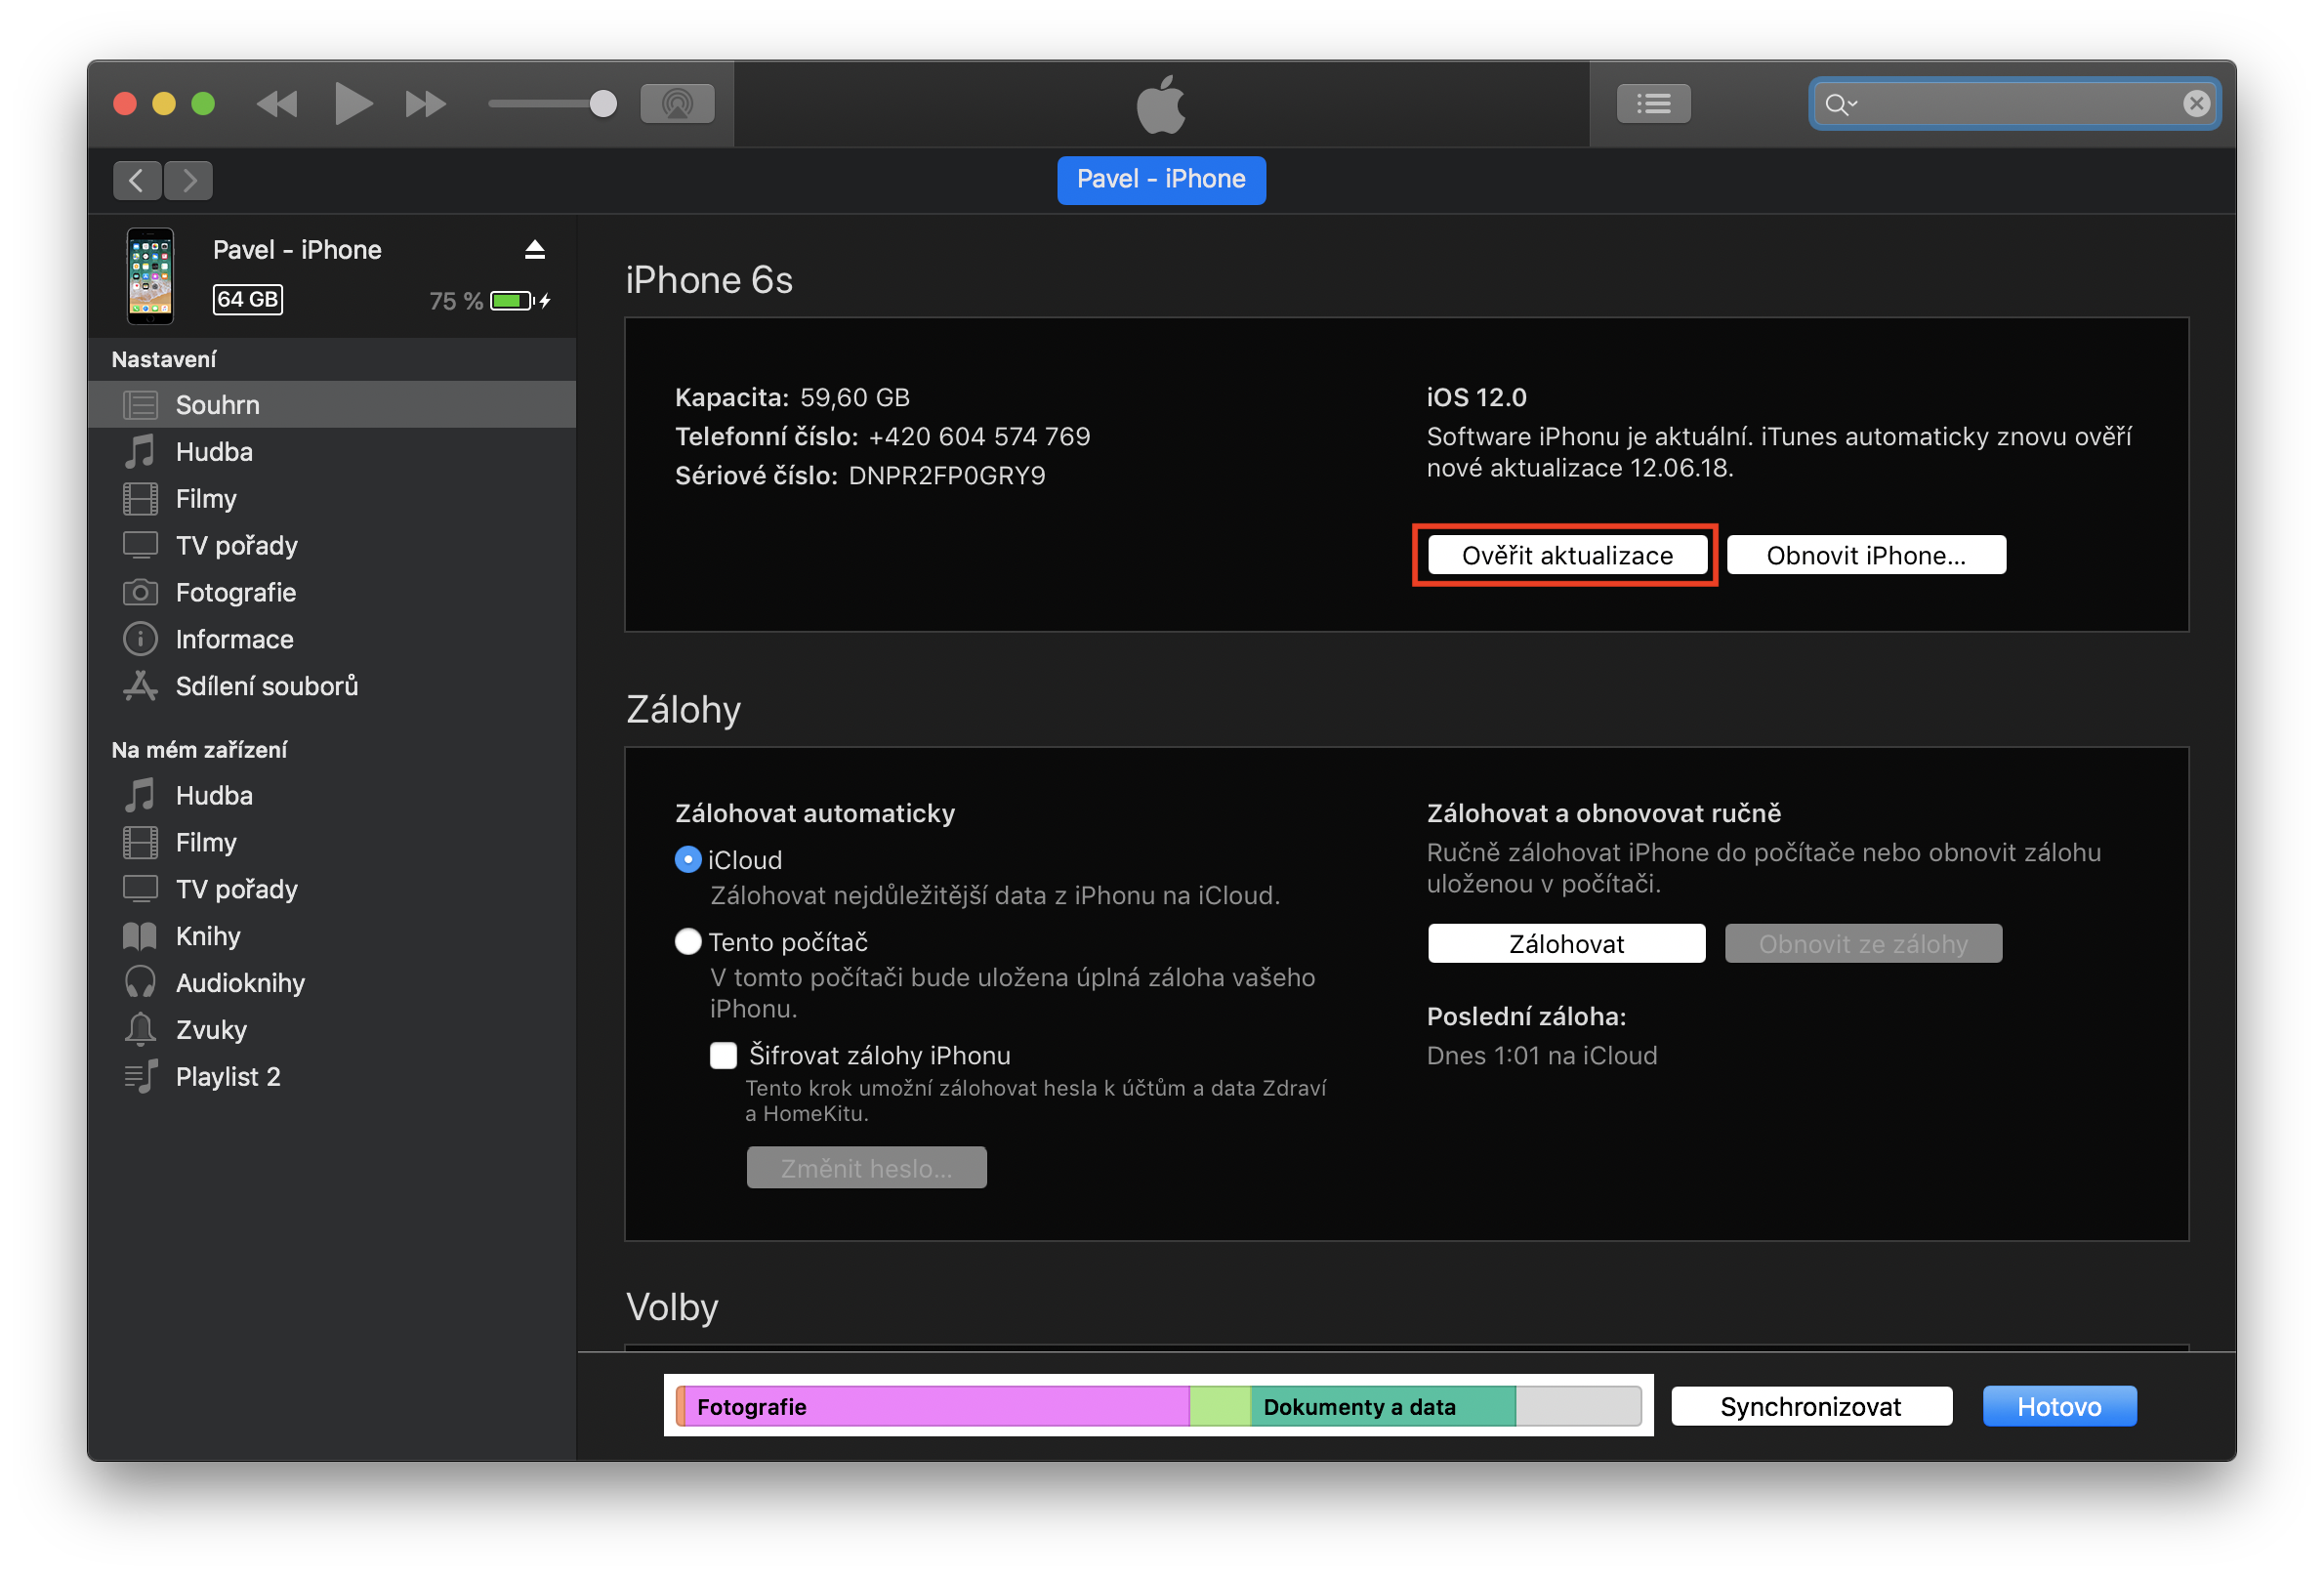
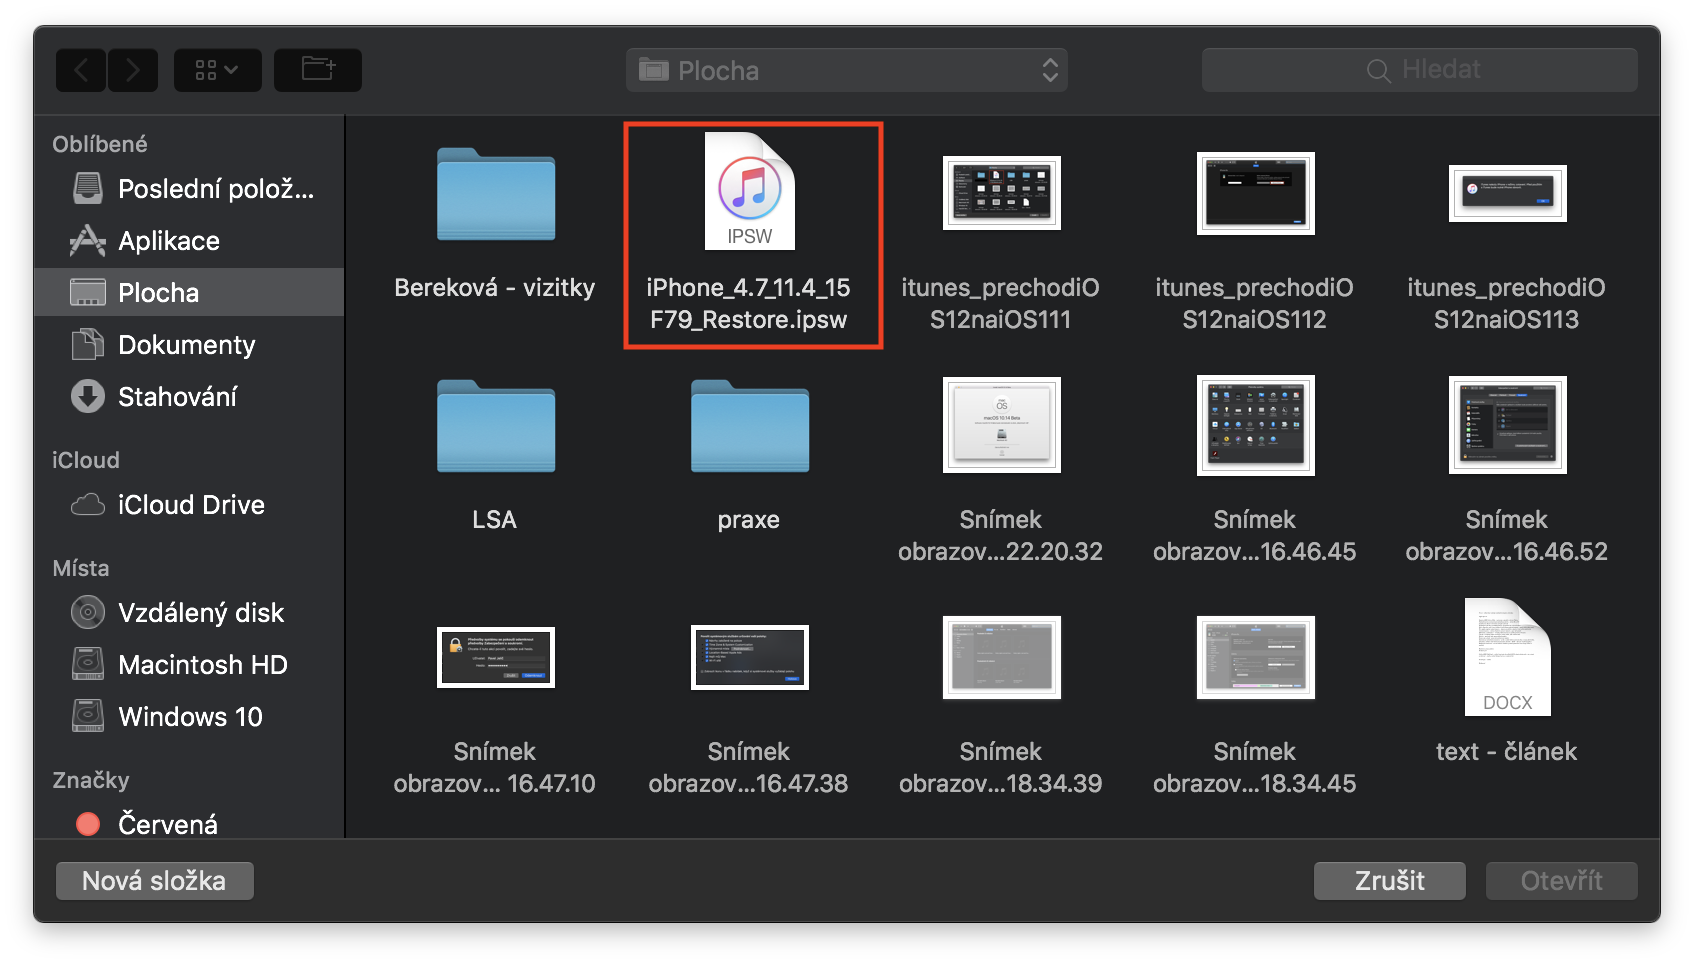
Once you have downloaded the IPSW file, all you need to do is connect your device using Lightning cable to the computer. Then open Finder on Mac (iTunes na Windows) and click the option with a connected device. Now you need to hold down a key on your Mac Option (for older keyboards Alt and in case Windows key shift) and clicked the button together with her Check for updates… After that, a window will open where you just have to do it choose an IPSW file, which you downloaded in the first part. Then just click on the option Refresh and update. Then just follow the on-screen instructions.
Notice
You will not lose any important data during this procedure, but it may happen that the entire system will be nestThe main files you will lose include call history, all SMS and iMessage messages. On the other hand, once you downgrade to iOS 15.5 successfully, you can make a backup again, and then install a clean system, which you then restore from the backup. This can eliminate any potential problems.
How to return from iOS 16 back to iOS 15 – clean installation
1. Download IPSW
Right from the start it is necessary that you these pages downloaded to your PC or Mac iOS 15.5 for your device. So after clicking on these pages, choose exactly your device, and then click the last one AppleI have a signed version. iOSOnce you do that, all you have to do is press the blue button Download. After downloading, you will see an IPSW file, which is used to downgrade or restore the device. Depending on your connection speed, this file may take some time to download as the file is several gigabytes.
2. Turning off the Find function iPhone
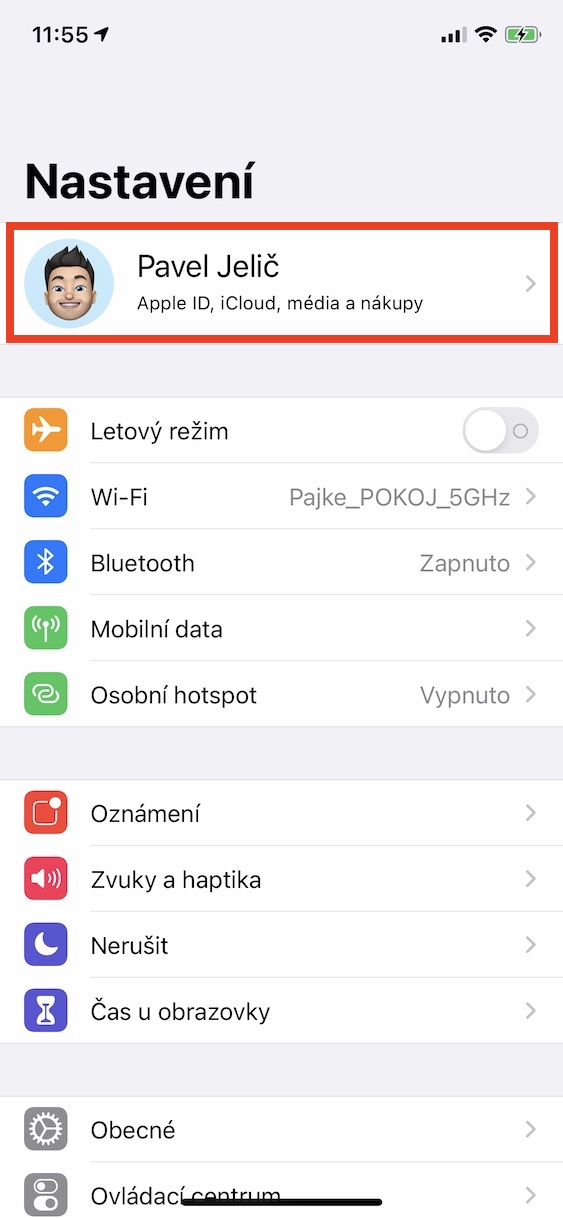
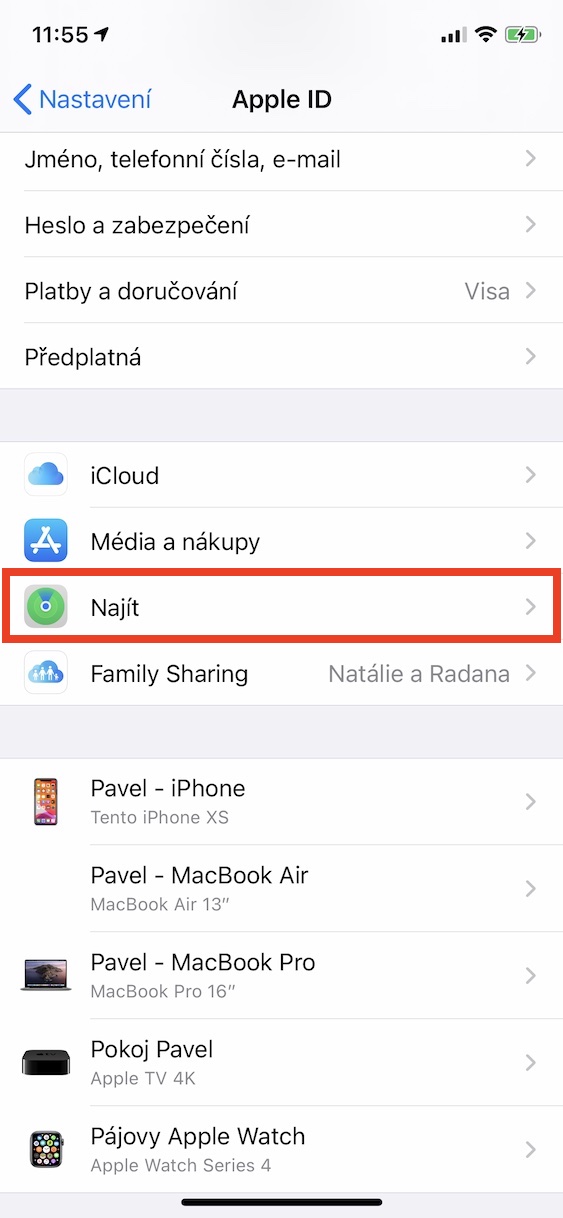
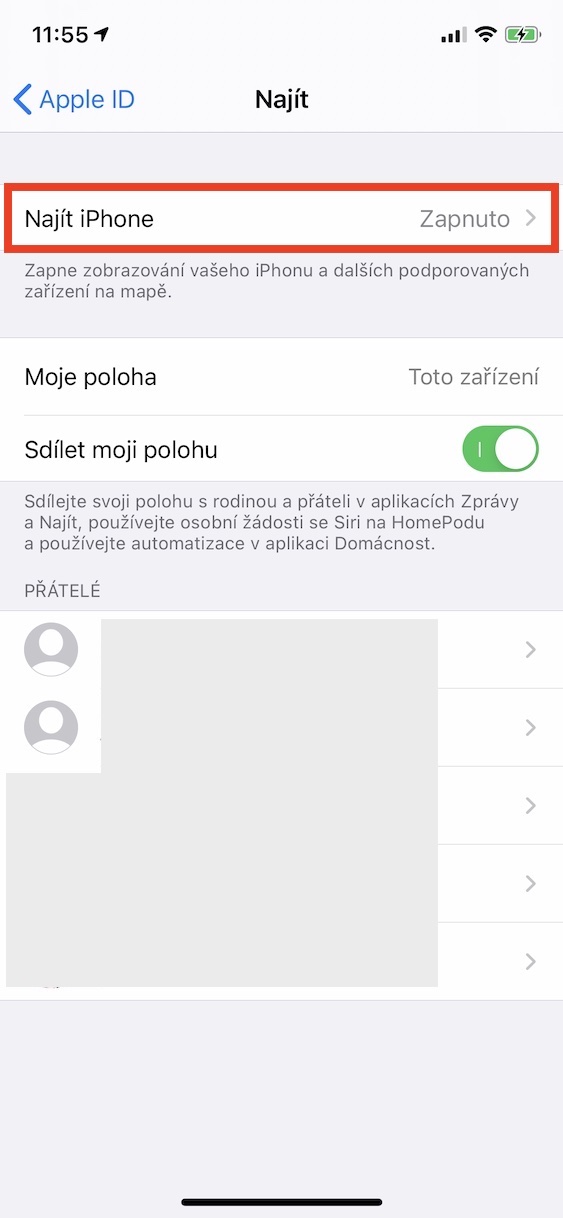
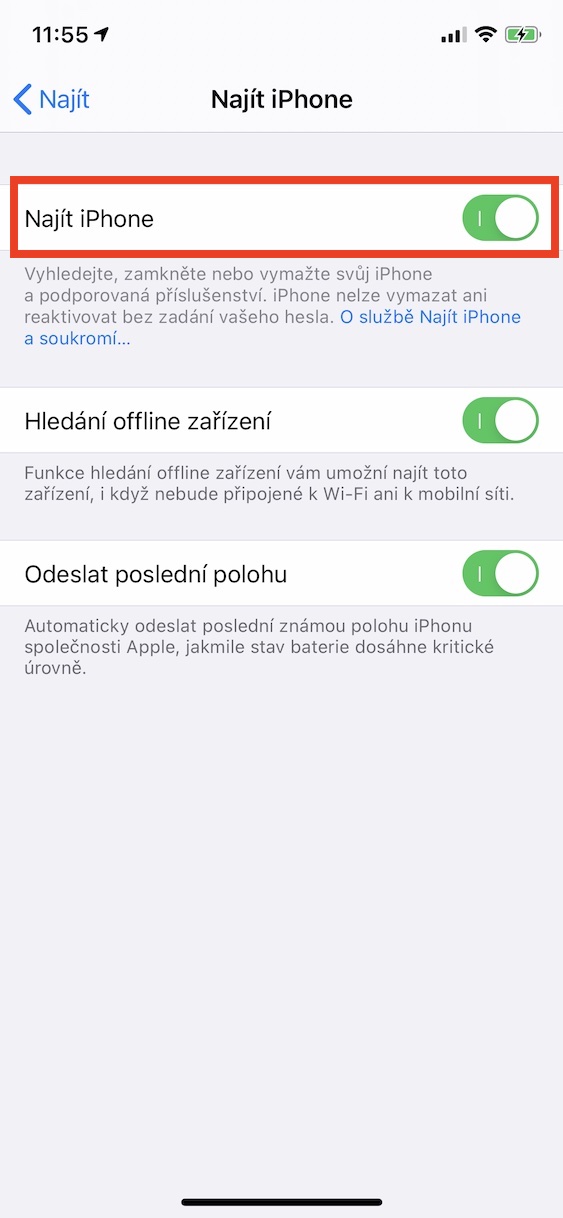
Once your IPSW file is downloading, grab your iPad and go to Settings, where click at the top Your name. Then tap on Find and click the option Find iPhone. Once you click this feature, toggle it deactivate. After that, you just have to enter password to Apple ID and confirm deactivation of the function.
3. Move to DFU mode
Then your iPhone enter DFU mode. The steps to enter DFU mode vary depending on the device you are using. Below is a description of how to enter DFU mode for all available iPhones:
If you are using iPhone X and later, you can get into DFU mode as follows: connect your device to your Mac/PC, then press and release the Volume Up button, then press and release the Volume Down button. Then hold down the Side button for 10 seconds until your iPhone screen goes black. While still holding down the Side button, press and hold the Volume Down button for 5 seconds, then release the Side button and hold the Volume Down button for another 10 seconds (the screen should remain black). iTunes should now show that your iPhone is in DFU mode.
If you are using iPhone 7 or 8, you can enter DFU mode as follows: connect your device to your Mac/PC and turn off your device. Then hold the power button of your iPhone 7 or 8 for 3 seconds. After three seconds, you will come to hold the power button and the volume down button. Hold both buttons together for about 10 seconds. If the logo appears Apple, you must try again. If a lock appears on the screen, you've won and you're in DFU mode.
If you are using iPhone 6s and older, you can get into DFU mode as follows: connect your device to your Mac/PC and turn off your device. Then hold down the power button of your device for 3 seconds. After three seconds, you will come to holding the power button and home button. Hold both buttons together for about 10 seconds. Then release the power button after ten seconds, but still hold home button. If iTunes displays a message stating that a device in recovery mode has been found, you're done.
4. Restore in iTunes
Gallery
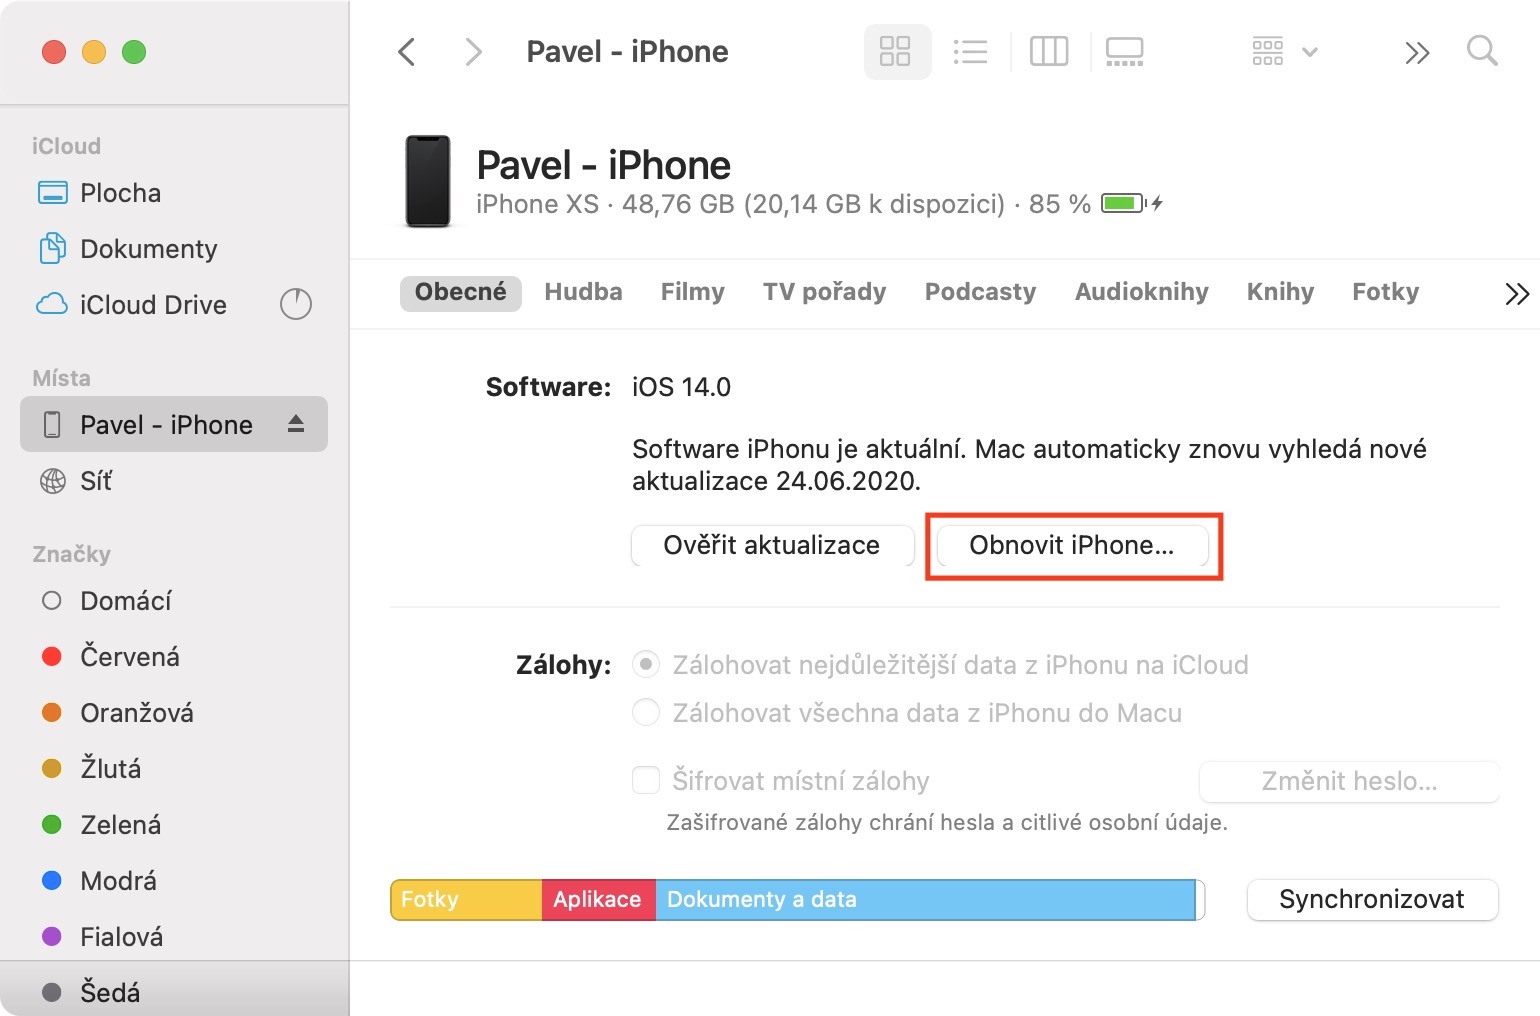
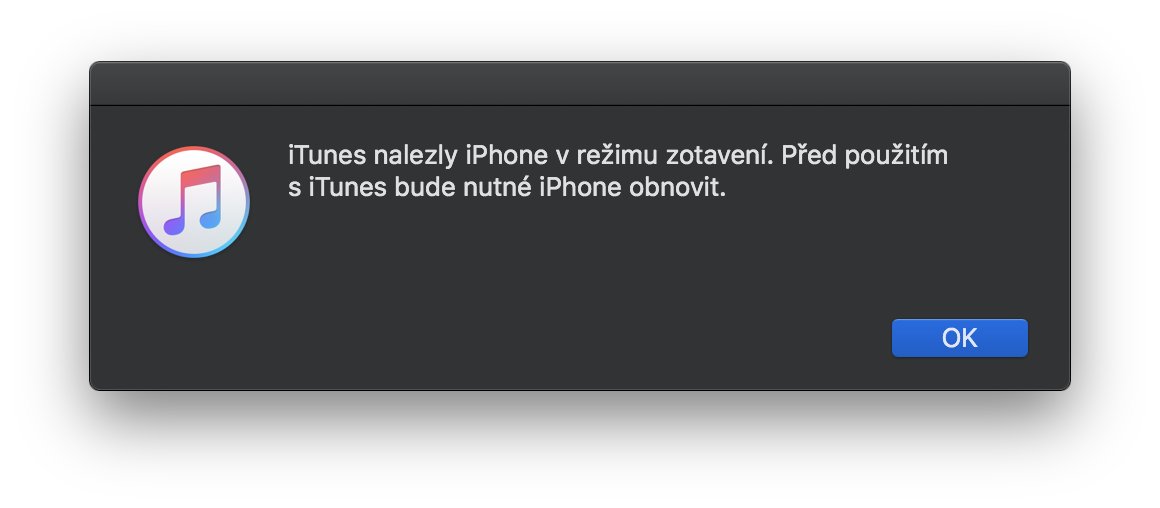
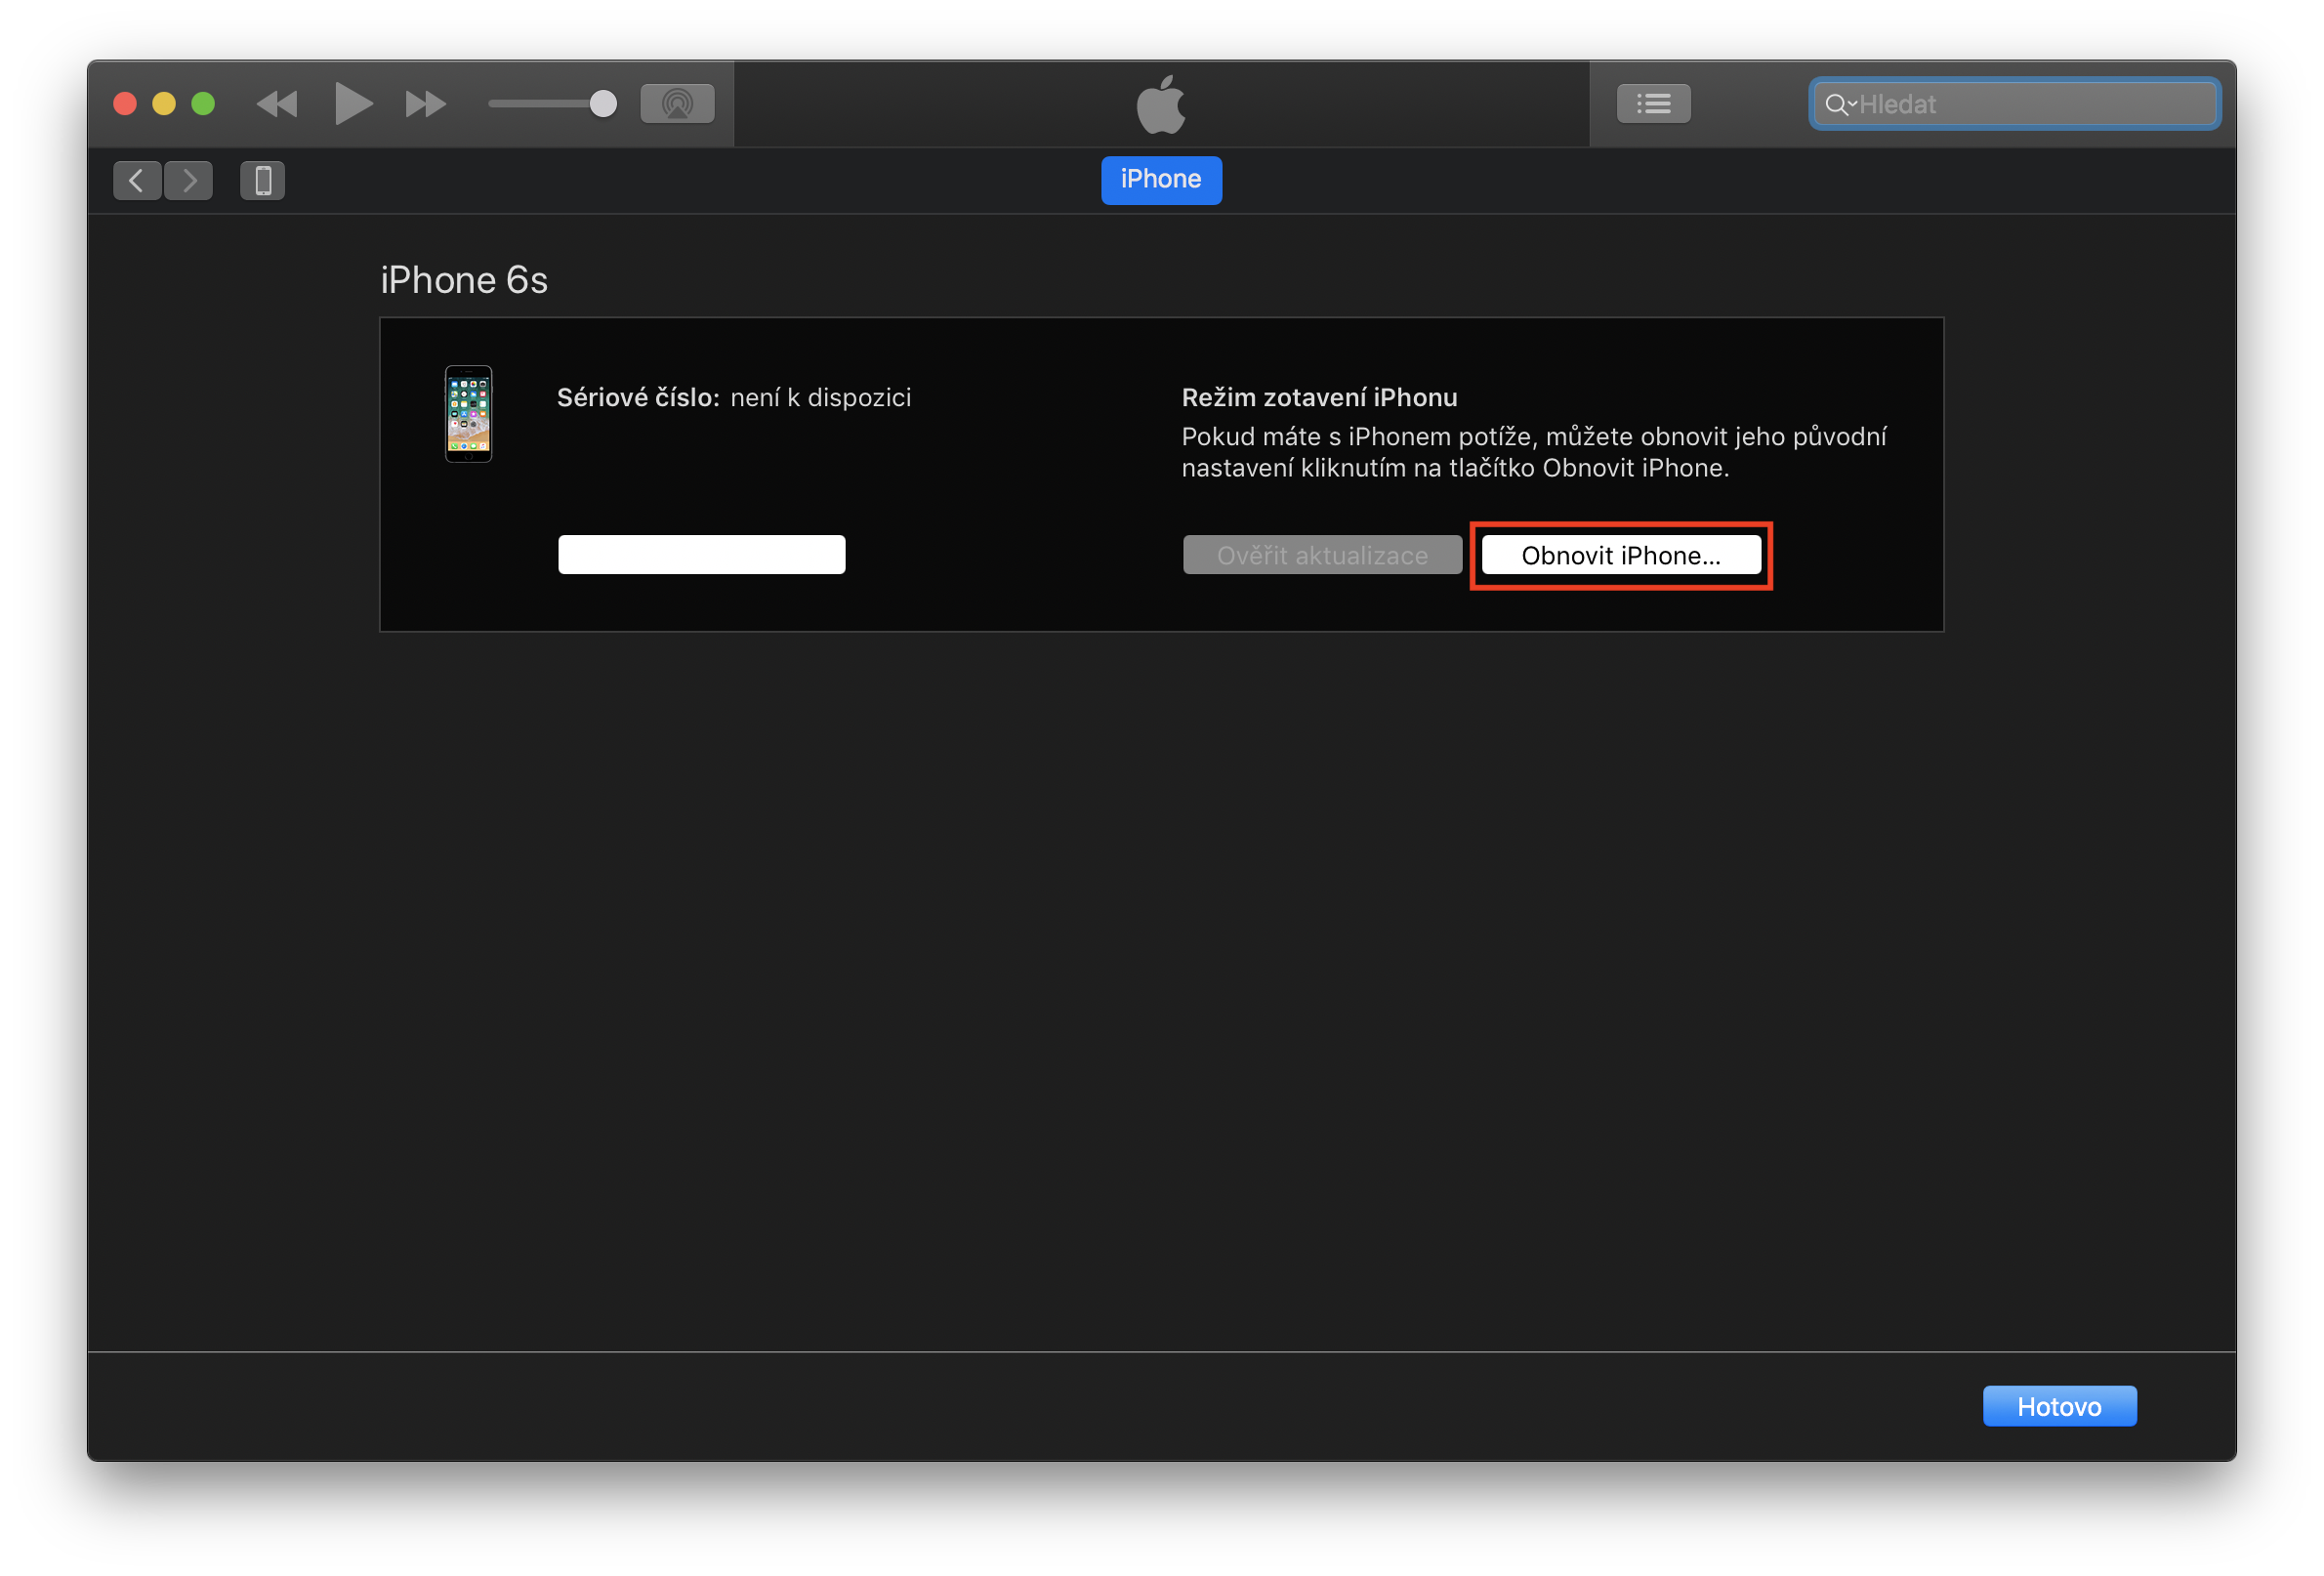
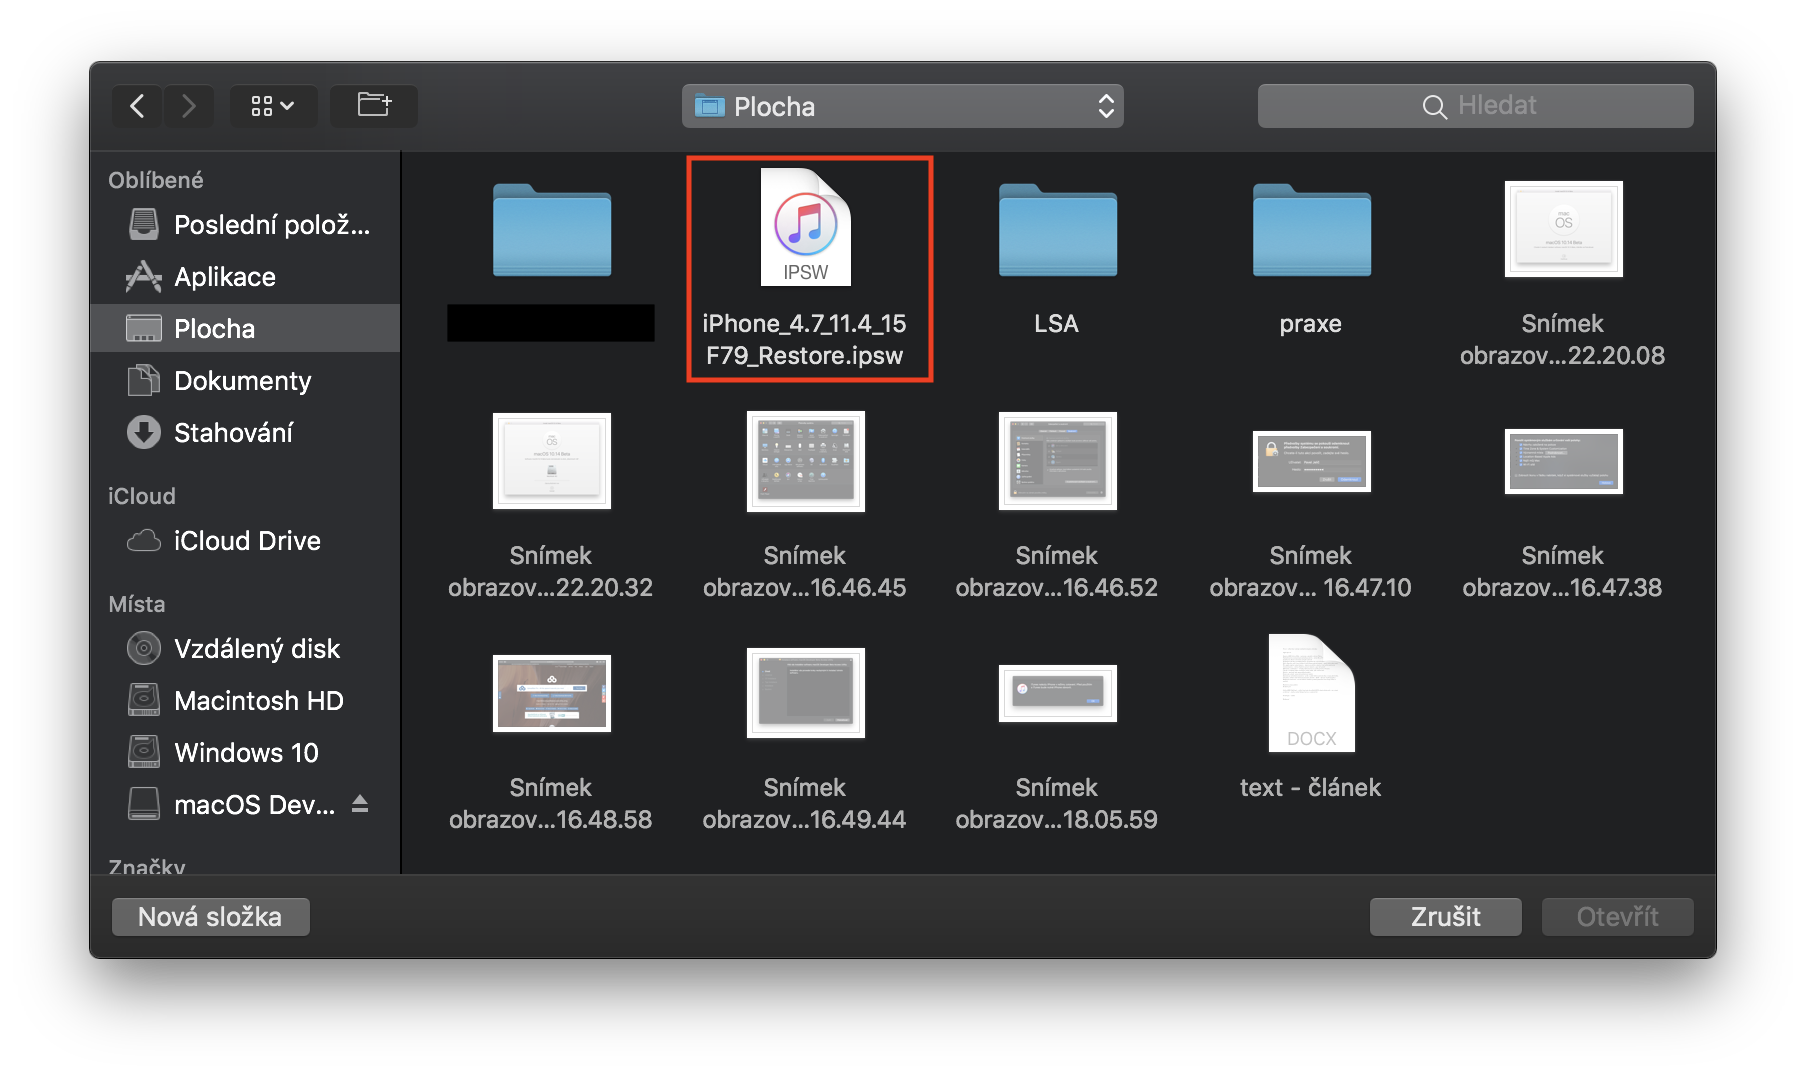
Once yours is iPhone be in DFU mode, then on your Mac, hold down the key Option (for older keyboards Alt and in case Windows key shift) and click the button together with it Restore iPhone... After that, a window will open where you just have to click on it IPSW file, which you downloaded in the first part. Then just click on the option Refresh and update.
iTunes will now restore your device - keep in mind that this process may take several tens of minutes. Do not disconnect your device from your Mac or computer at any time. After the restore is complete, you can choose whether you want to restore your iPhone set as new or restore backup from iOS 15.5.
Notice
If you use this guide to go back to iOS 15.5, you will lose all your data. Anyway, if you have backed up your data before installing iOS 16 made a backup, now is the best time to use it. After a clean install, your device will behave as if you had just bought it. You will need to log in to Apple ID, to Wi-Fi networks and of course, after the initial setup, you will have the option to restore the system from a backup, which you can do if you have a backup.






and where can I download the 16? :D
Zeby from the server Apple? :D
do you mean dev beta? from the article it sounds like there is an ofiko update to the world.
How about watch os? Unfortunately, I have an upgraded watch and phone, so I wonder if I put the phone back to 15.5 if it will communicate properly with the watch that is on beta?