
If you use your Mac for work, chances are you use the native Mail app to communicate. It can be surprisingly powerful and useful under certain circumstances. How to be most efficient with Mail in macOS?
You might be interested in
VIP groups
Some emails are simply more important than others. The creators of Mail know this very well, which is why they created a VIP category in the application for the most important contacts. You will see messages from VIP contacts in Mail as a priority. How to mark selected contacts as VIP?
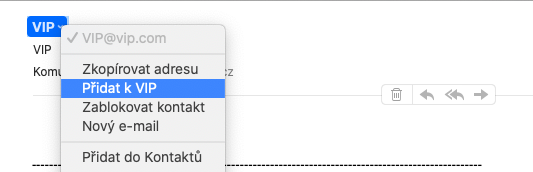

- In the Mail application, select the message whose sender you want to include as a VIP.
- Click on the sender's name in the email header.
- Select "Add to VIP"
After following these steps, you may notice that an asterisk appears next to the sender's name, and messages from VIP senders can be found in the VIP inbox.
VIP notifications
Pro You can also set your own notifications for VIP contacts. How do I do that?
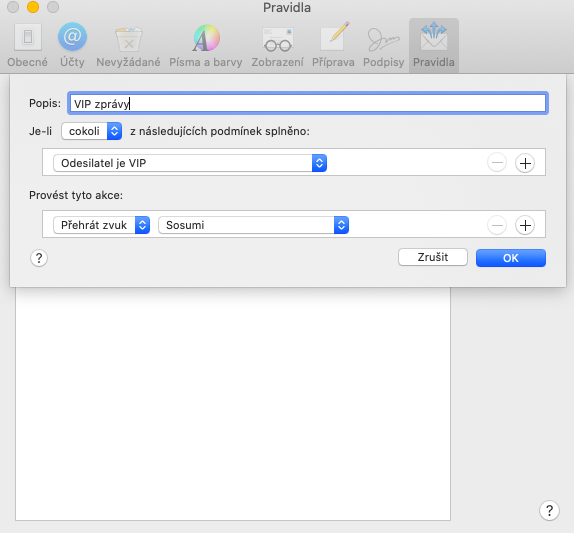
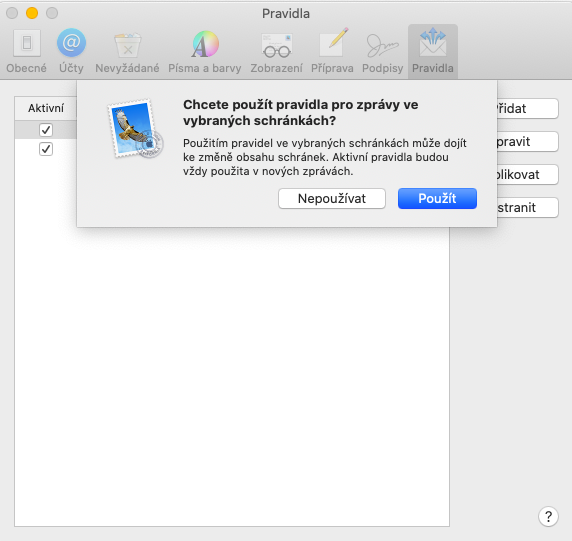
- With the Mail app running, click Preferences in the top bar and select Rules.
- Click Add Rule.
- Name the new rule, in the "If" category, in the "any/all" drop-down menu, choose "anything".
- In the "Condition" category, select "Sender is VIP"
- In the next category, select "Play Sound" and select the appropriate sound.
Email groups
If your work also involves team communication, creating groups for email correspondence can make it much easier. Pro For this purpose, launch the Contacts application on your Mac and proceed as follows:
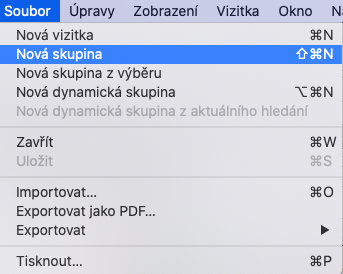

- In the top bar, click File -> New Group.
- Name the group and confirm - then just add the relevant contacts to the group.
Set up email rules
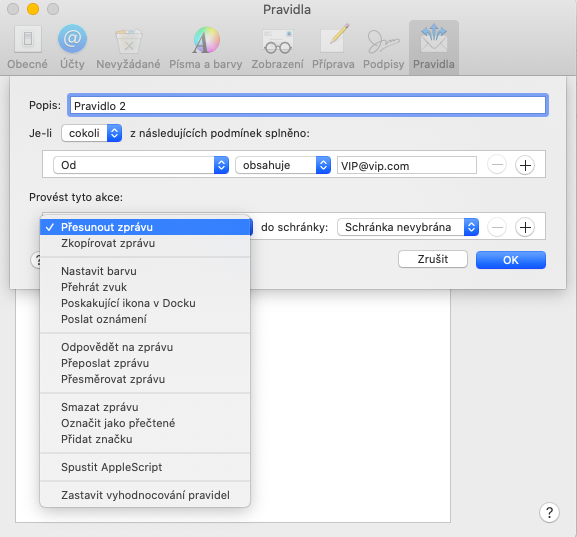
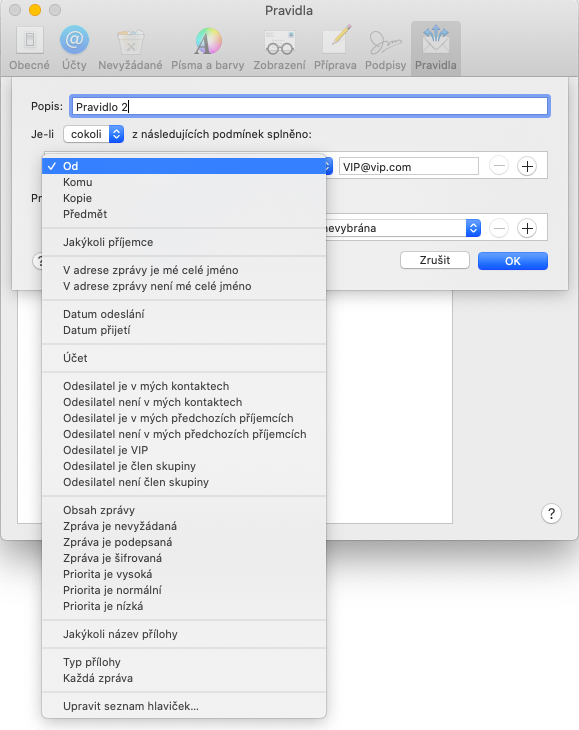
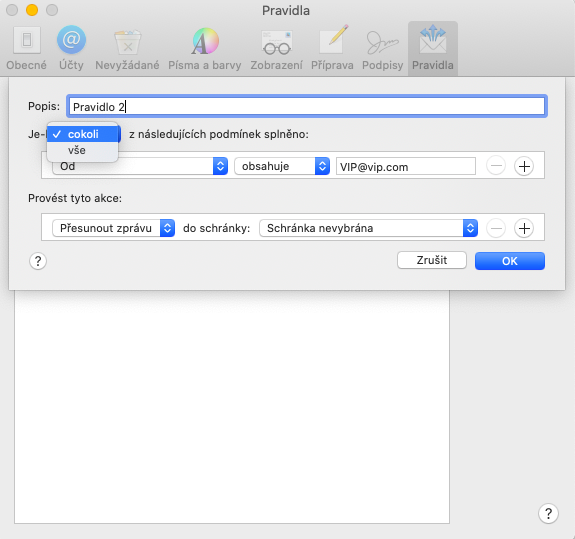
When setting up notifications for VIP contacts, you may have noticed that you can create different rules in Mail for Mac for various situations. Just launch Mail, click Preferences -> Rules in the top bar , and then program the application's behavior depending on different types of messages. You can set a specific response for a particular sender, delete messages, move them to other mailboxes, and much more.
Dynamic mailboxes for unanswered emails
So-called dynamic mailboxes in Mail for macOS also work on a similar principle to the rules mentioned above. Pro You can set your own conditions for incoming emails – however, in the case of dynamic mailboxes, these conditions do not apply to moving, labeling or notifications for messages. Thanks to these mailboxes, incoming messages remain in their original mailboxes, but they also appear in their own dynamic mailboxes. Does that sound too complicated? Don't worry, it's an intuitive and useful process.
Gallery
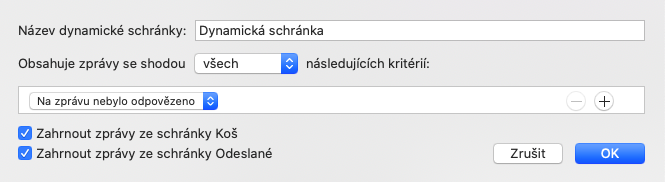
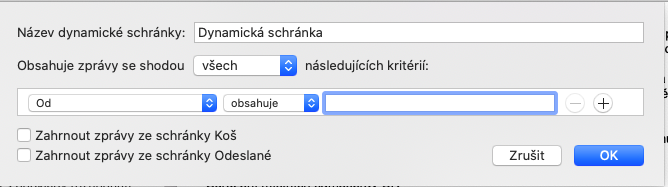
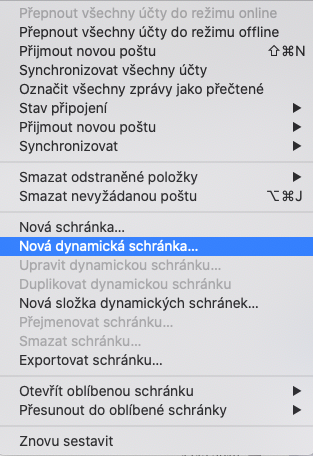
- Pro To set up dynamic mailboxes, click Mailbox -> New dynamic mailbox.
- In the content rules, select "All", then in the next line select "Message not replied to".
- You can add additional conditions by clicking on the "+" button.
- Please confirm.




I use dynamic mailboxes.. but it has one error. If I receive an email and I want to manually add it without rules to a certain ready-made dynamic mailbox, it just doesn't work..
The native Mail application is good, I use it every day, only one thing bothers me. If I want to use the email mailbox primo from apple with "Push" polling, so nestIf I read or delete a new message on one device - this status will not be synchronized on other devices - I have to open the Mail application on each device to synchronize read/deleted messages.
In other words, if the email goes out, I'll get it.one displays "1" and it signals on other devices until the email is opened on each device – nestOpen and delete an email on one device.
It is quite inconvenient and for this reason I use another provider with collection after set intervals.
edit – this works fine on mac – the problem only occurs between ios/ipad device.
In the case of exchange credit, sometimes it works, sometimes not... when I read a mail on Mac Mail, after a while it disappears from the locked screen of the iPhone, I have the feeling that in iOS 12 it worked reliably, in iOS 13, Mail is broken... but the comrades in Cupertino obviously have other concerns than basic functionality on mobile.